Motif Version 4 User Guide
Motif systems are controlled using a web user interface (WebUI). This means you open a web browser (we recommend chrome) to interact with the motif system. You do not need do install any special software on your computer.
The following sections list, in order, the steps required to power or your motif system and to record data.
Powering ON/OFF
To power on and off a Motif system push (not hold) the power button. Make sure you have stopped all recordings and cameras before powering off. Alternatively you can enter the "Administration" page and click "start" next to "poweroff".
Connect to your Motif system
For controlling your Motif system you need to connect to the WebUI first. There are different ways of doing this depending on your configuration.
1. WIFI
This is mostly used with field systems. A few seconds after powering it on the field system will spawn its own WIFI signal you need to connect to.
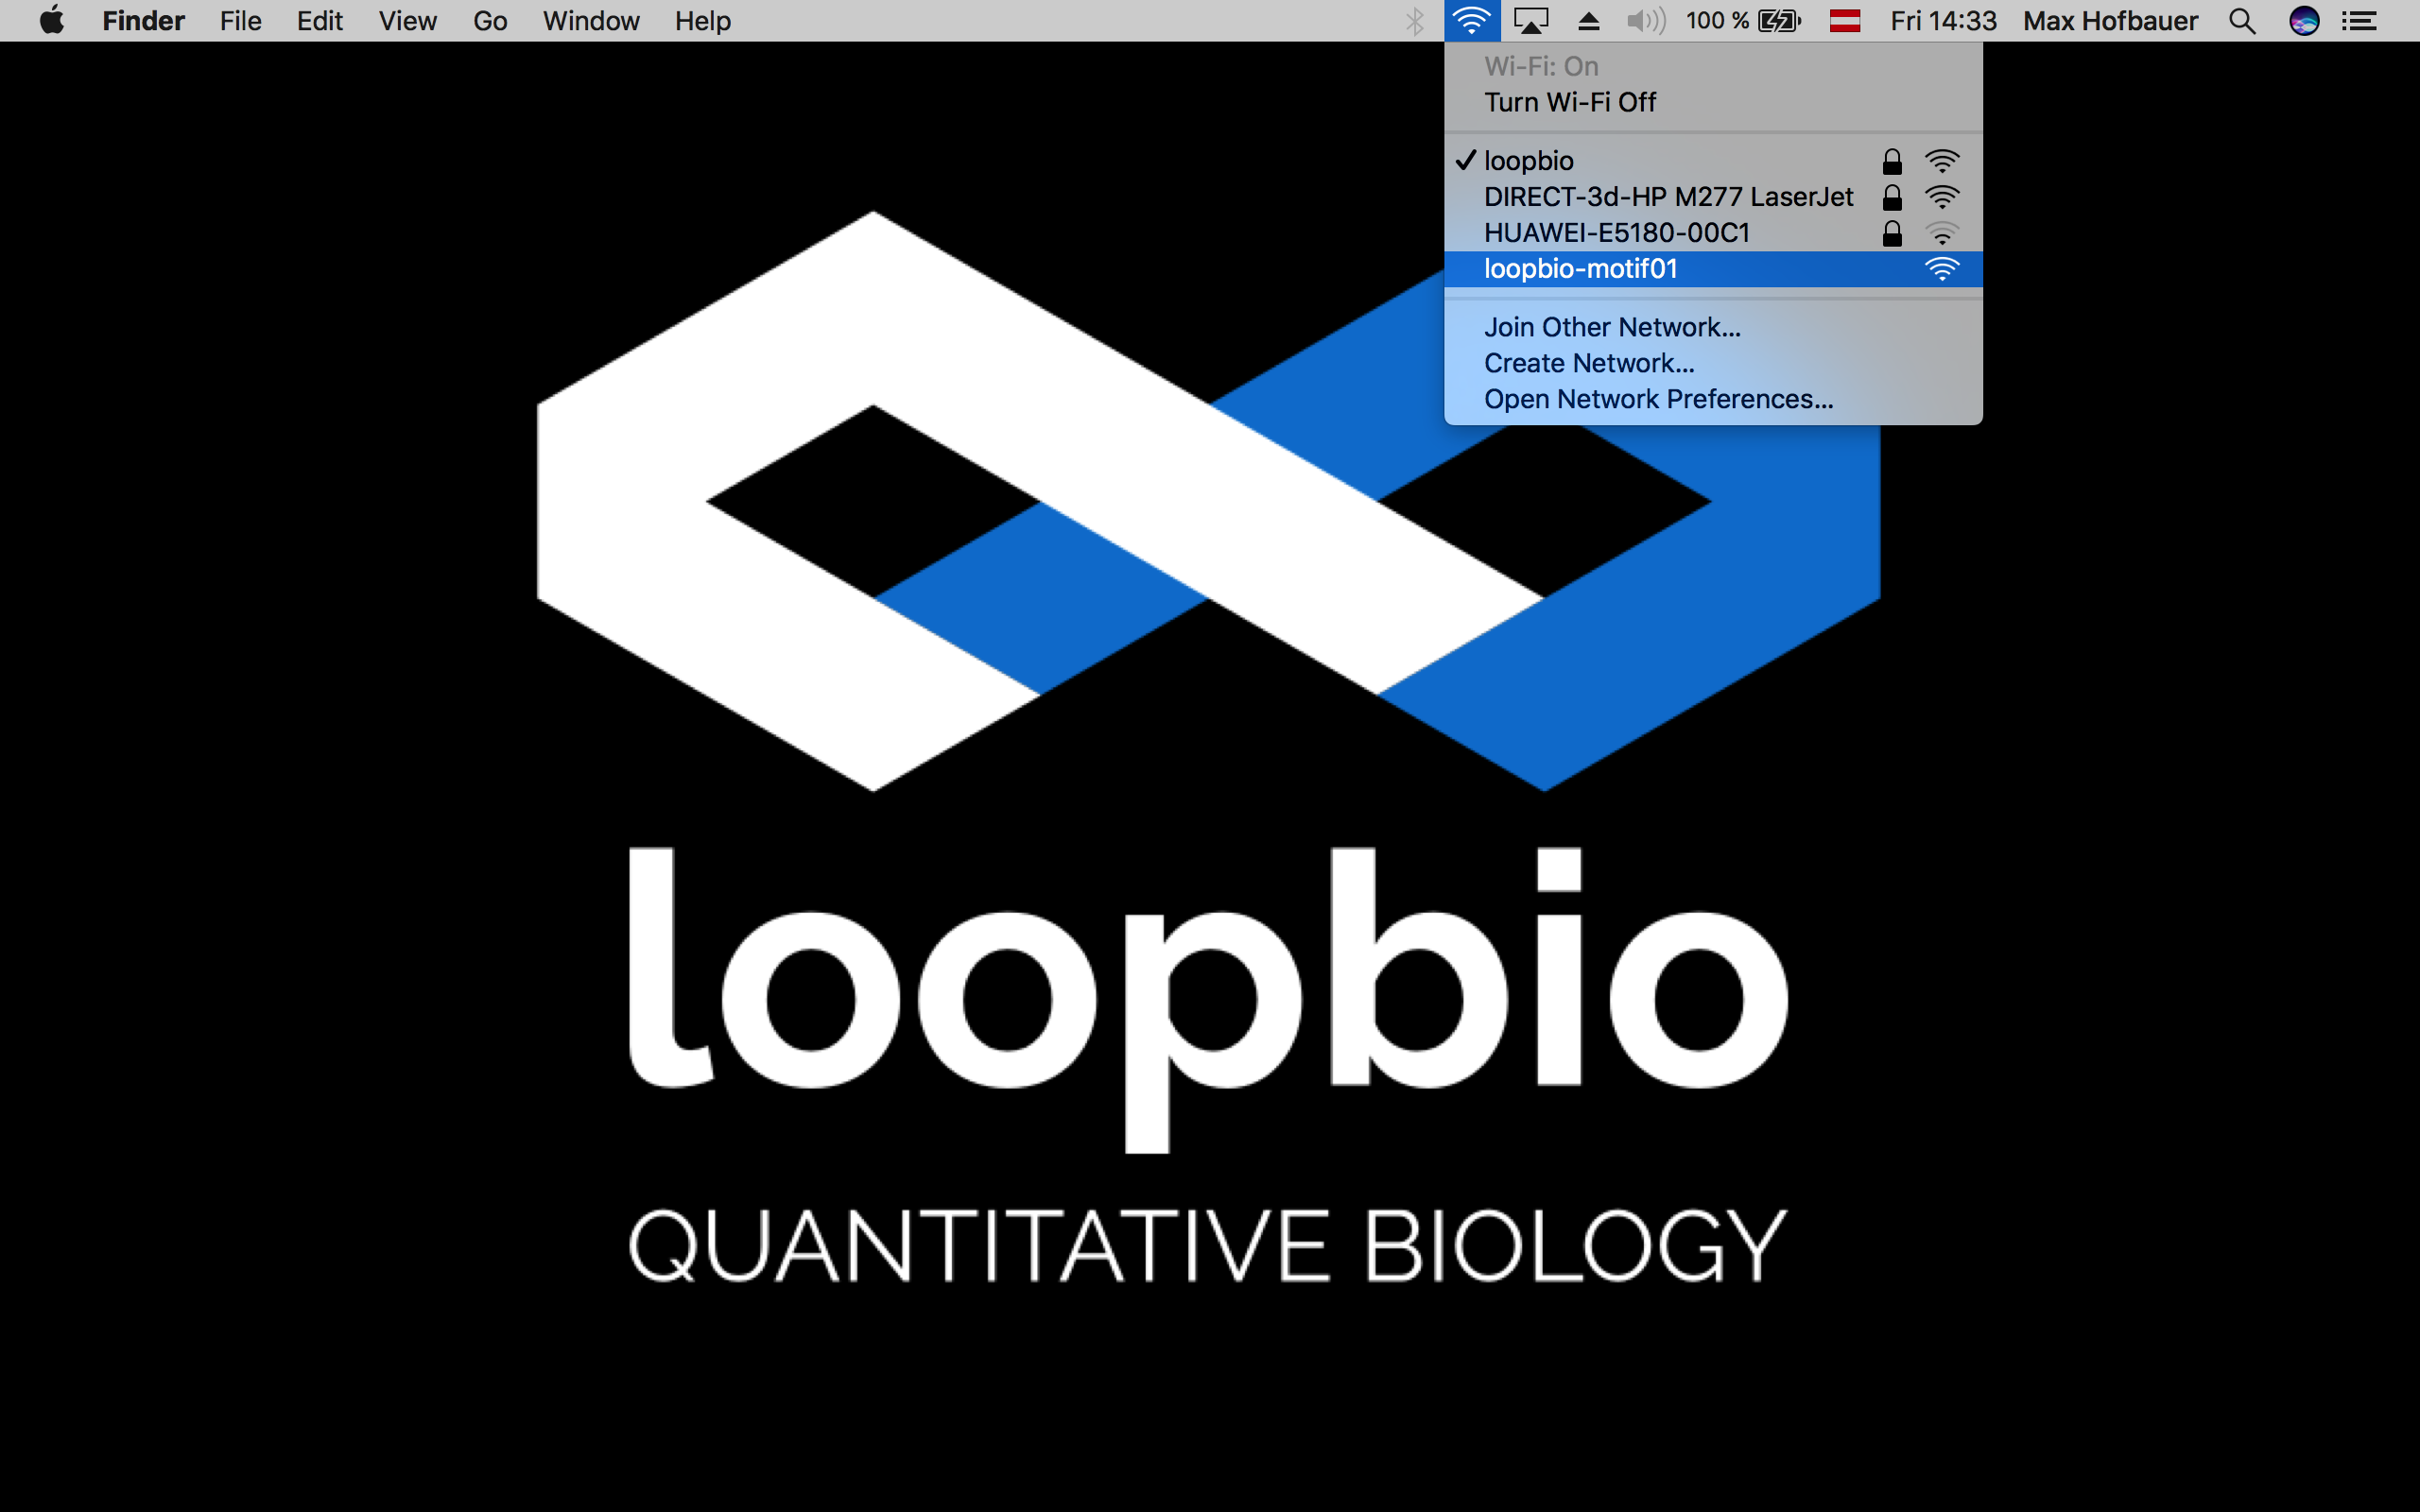
You can use your laptop, tablet or mobile phone. Please disable data transfer via cellular connection and make sure that your device will not switch the network while searching or trying to connect to the internet.
As soon as you are connected open your browser and go to http://192.168.0.1/

2. GigE (local network)
By default Motif lab systems (NOT FIELD SYSTEMS) are configured to provide the WebUI through their wired
GigE connection. Connect your Motif lab system to your local network and enter it's IP to your browser.
If you need special network configuration please contact support@loopbio.com
3. Monitor
Attaching a monitor to your Motif system allows you to log in as a guest user. Click the Loopbio logo on the left side. This will open the WebUI.
Start Camera
- Enter "Recording Control" (this page might looks different according to your configuration)
- make sure that the LED at the back of the camera is on.
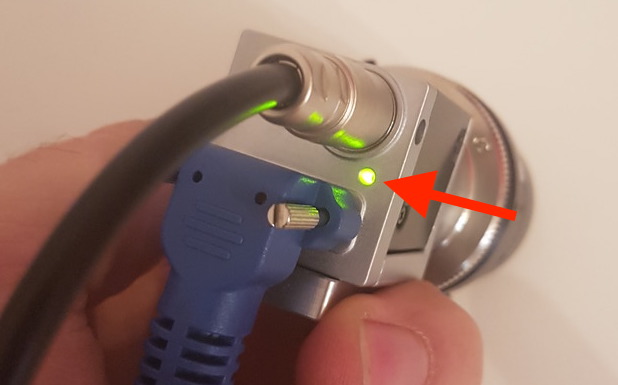
- click "Start" for each camera
- if you have a triggerbox make sure it is connected and detected ("Triggerbox: Connected"). If not you need to restart the recording unit.
Start/Stop Recording
- you need to have at least one camera started
- cameras do not need to be restarted before starting a recording. If a camera is already running we advise to not restart the camera.
Note, the user interface appears slightly different depending if you have a single or multiple camera motif configuration.
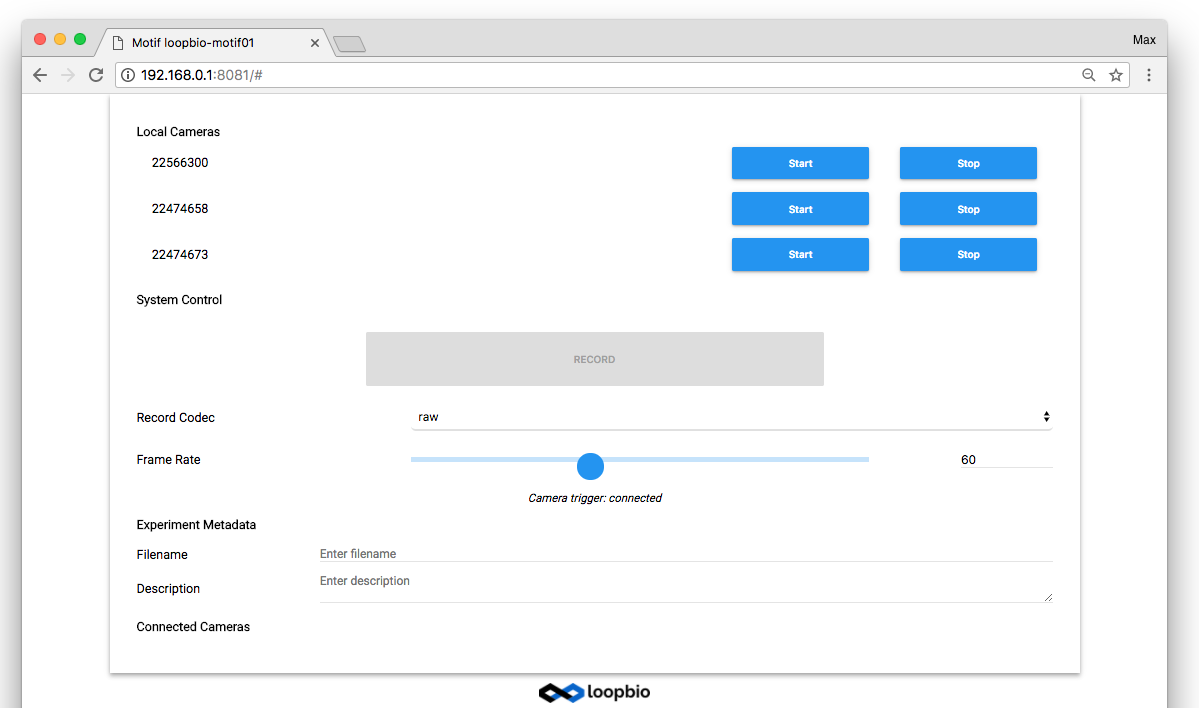
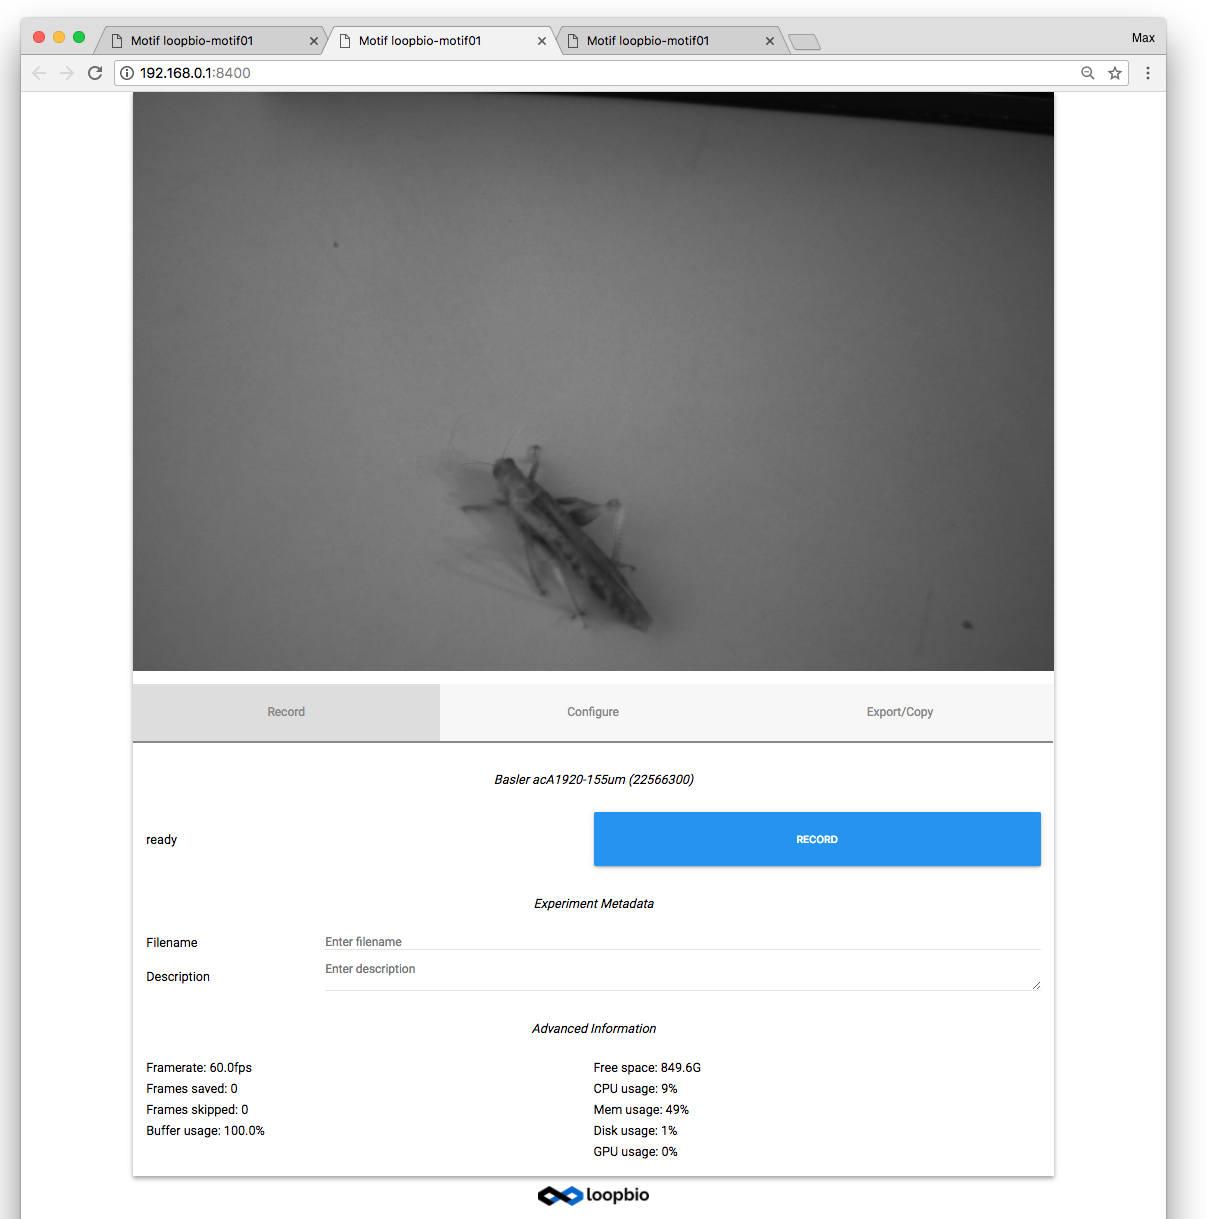
Single-camera System
- enter the camera menu
- start "Record" in the record tab
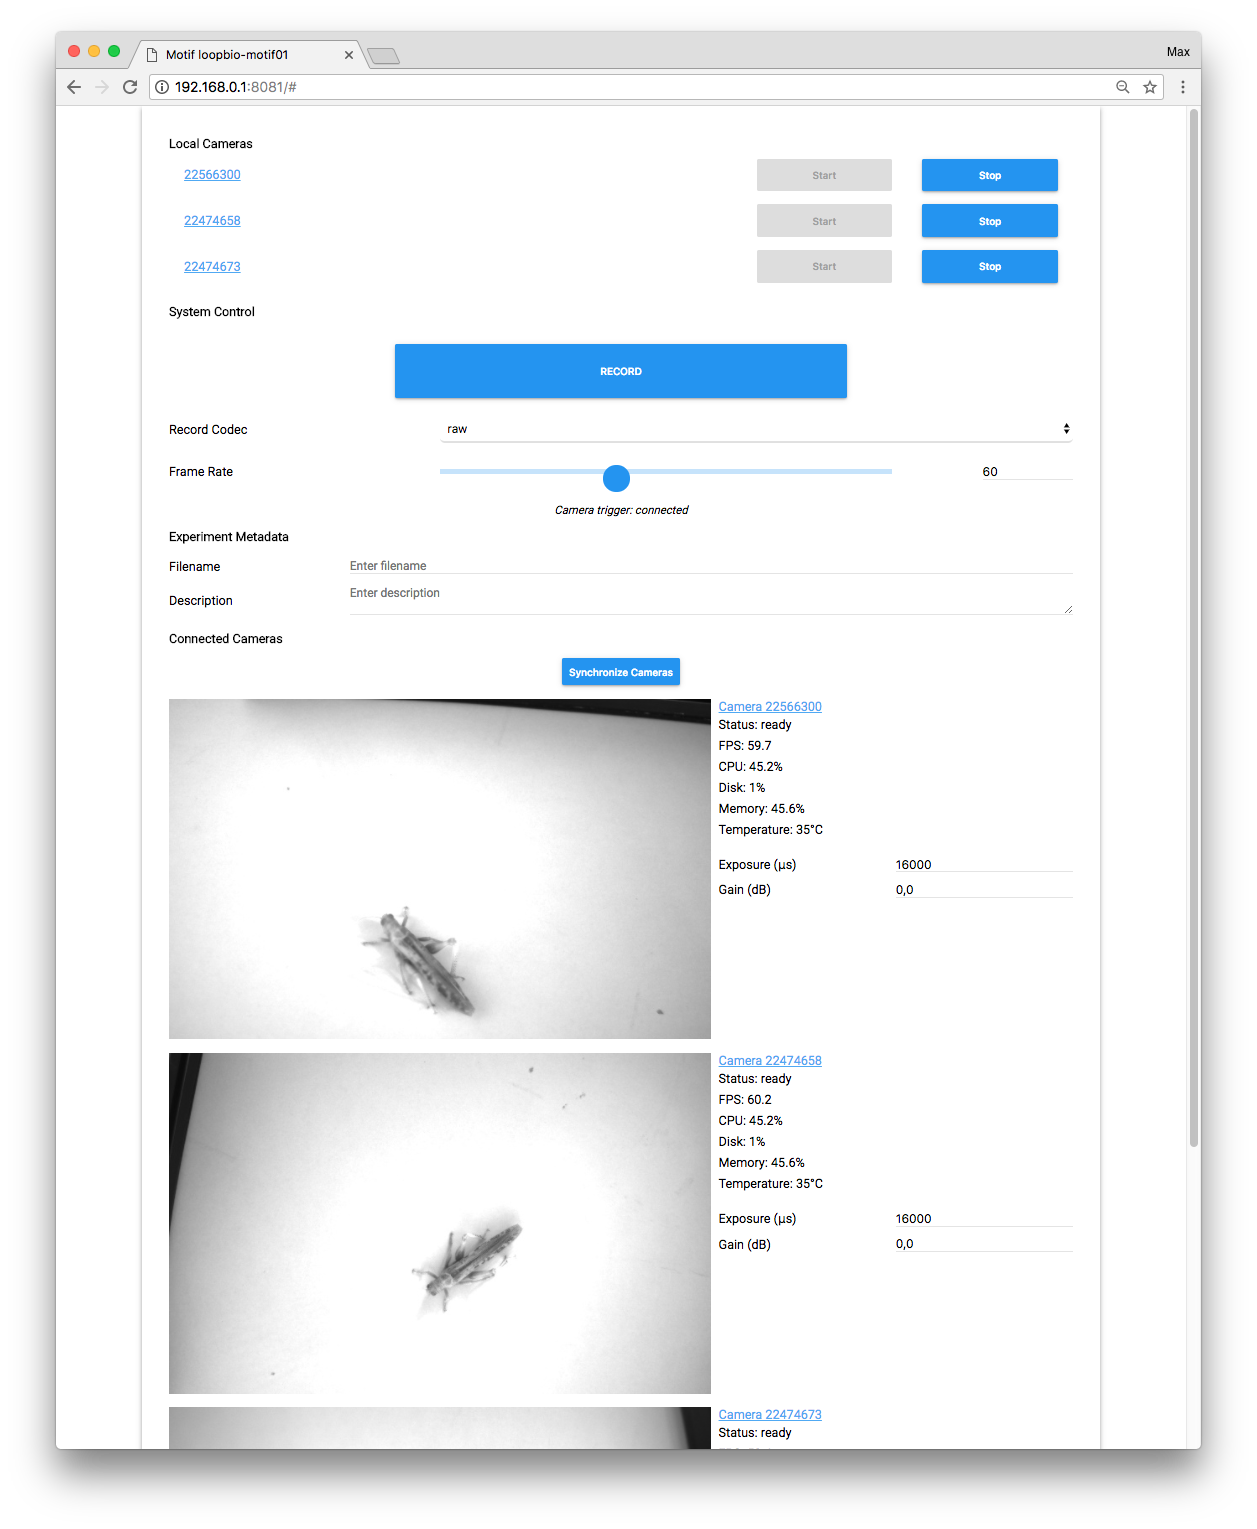
Multi-camera System
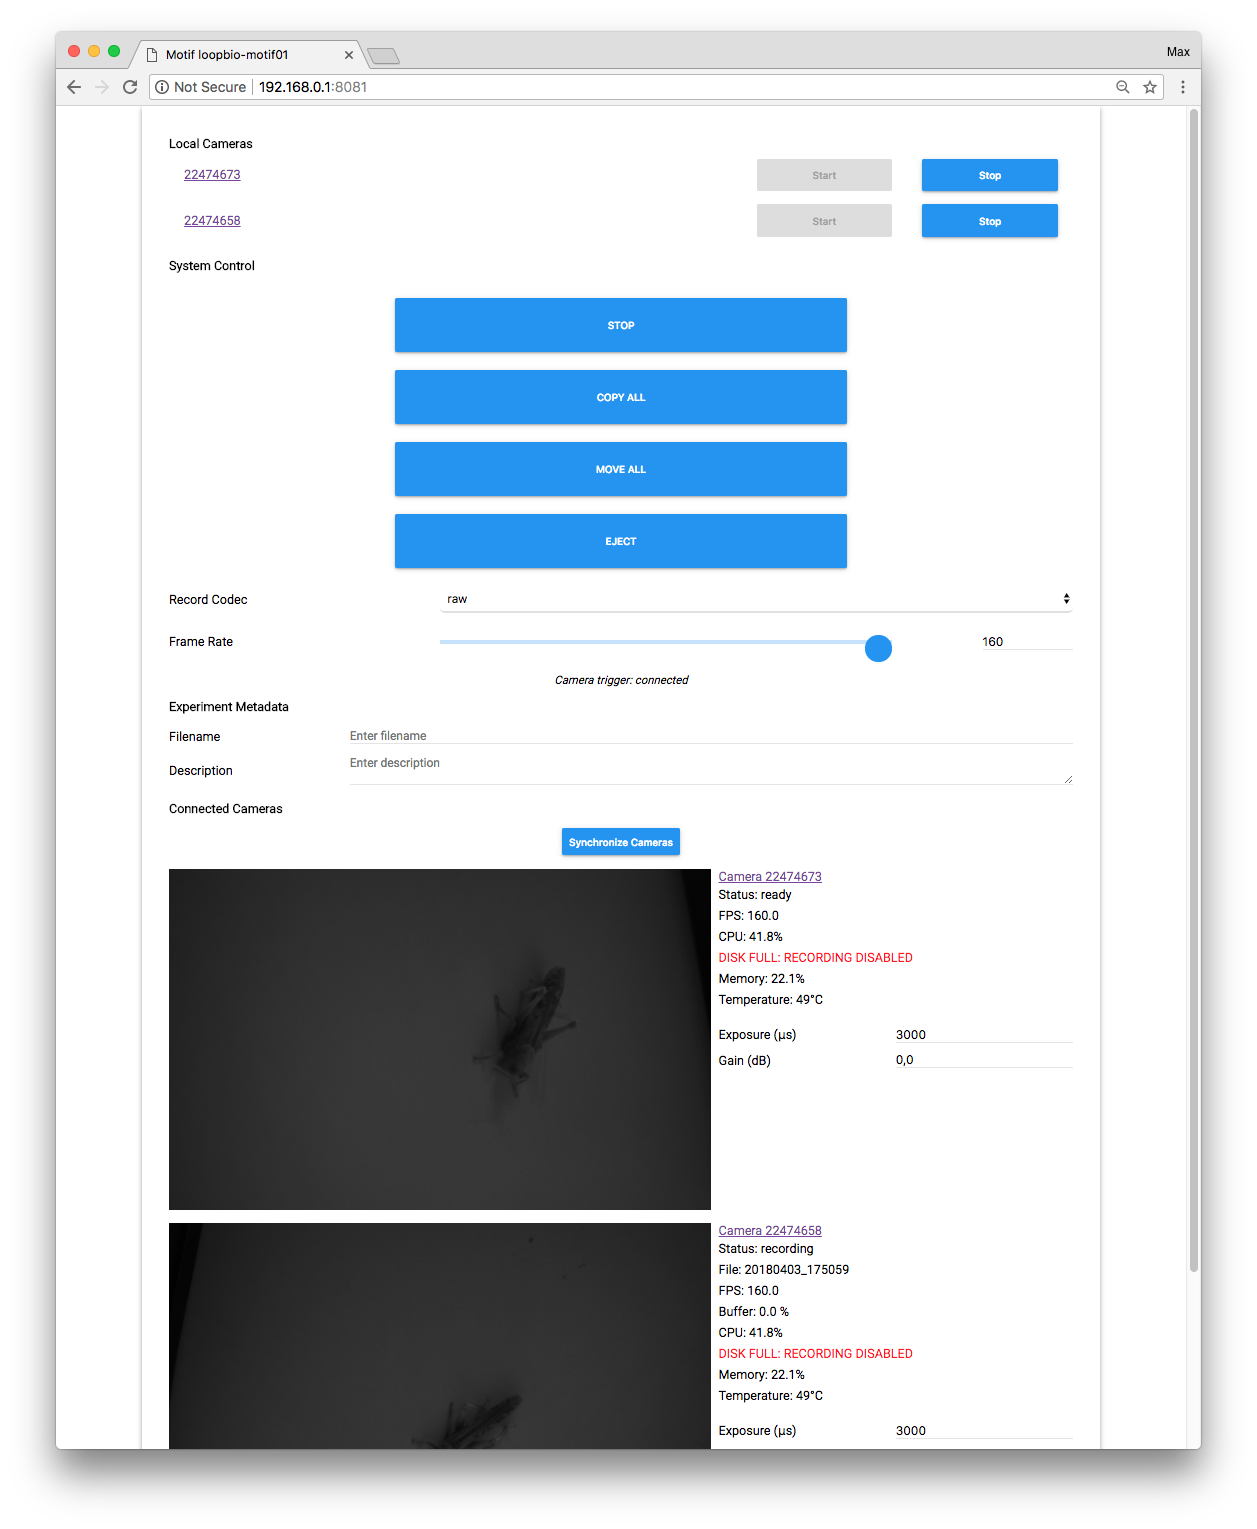
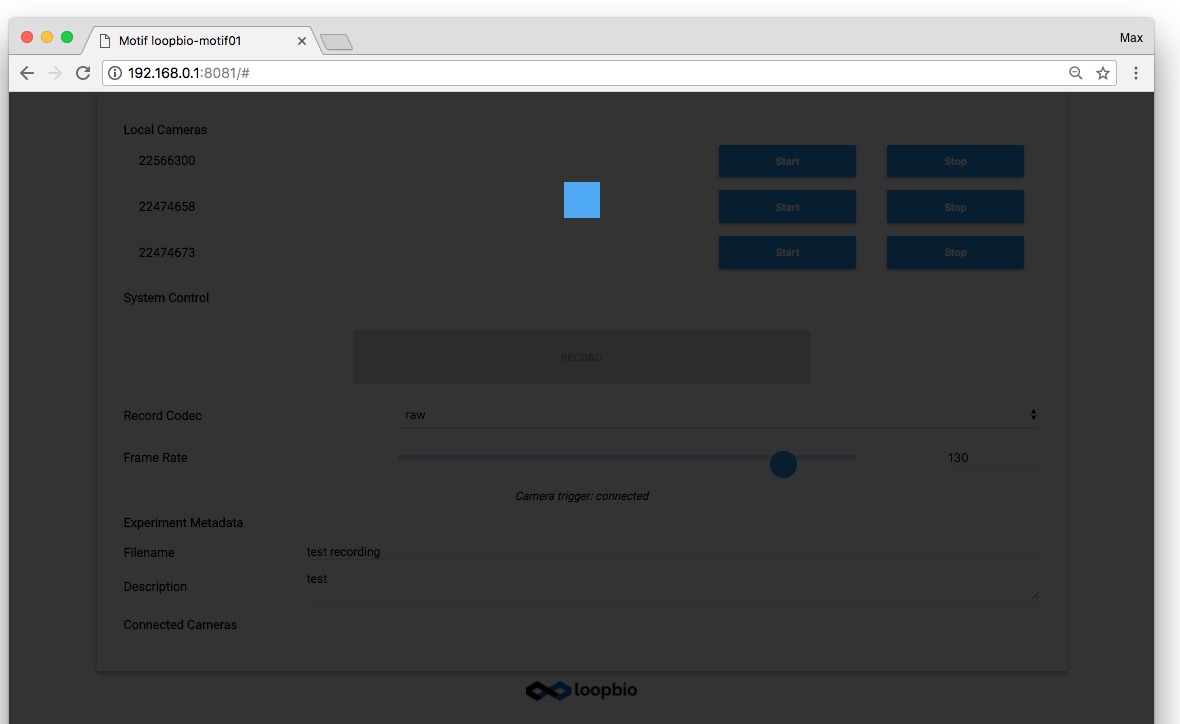
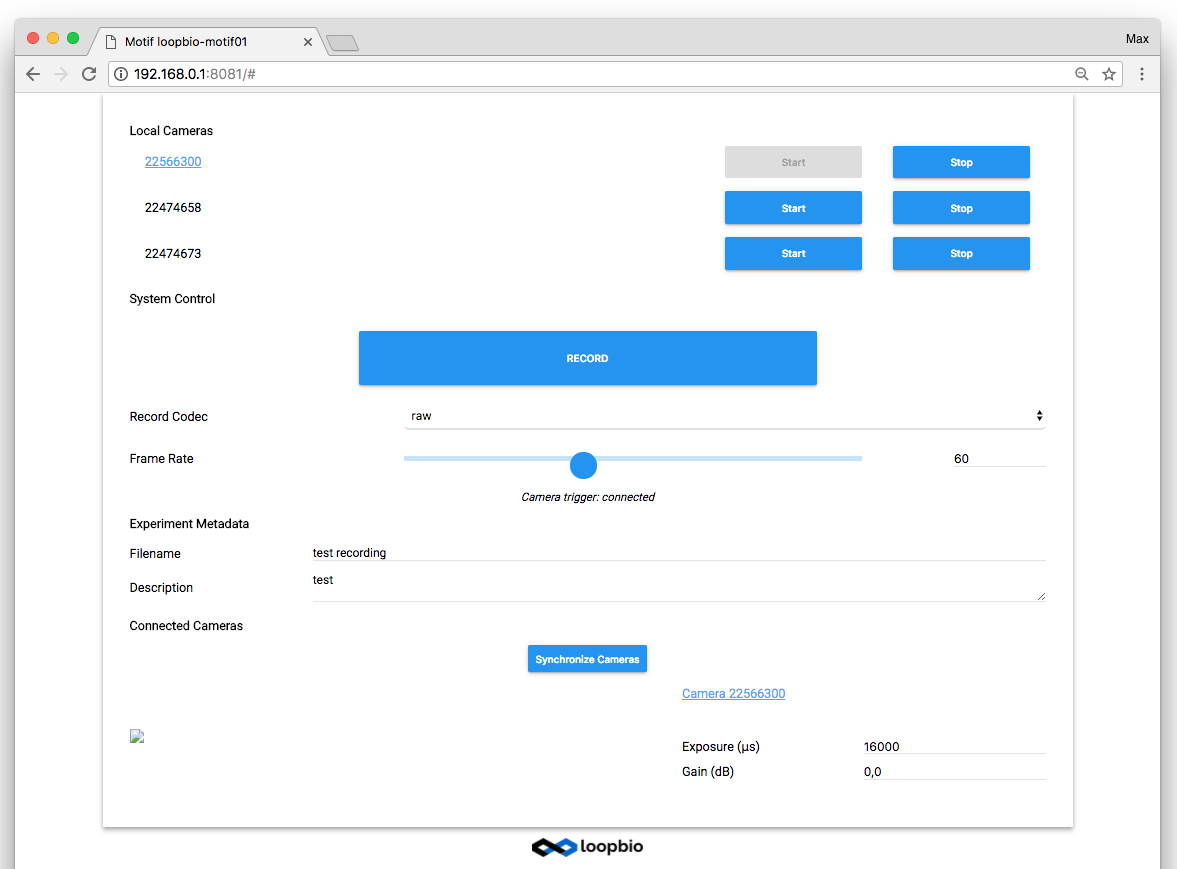
- enter "Recording Control"
- "Synchronize Cameras" (only if you have a triggerbox). wait a few seconds before starting recording
- "Record"
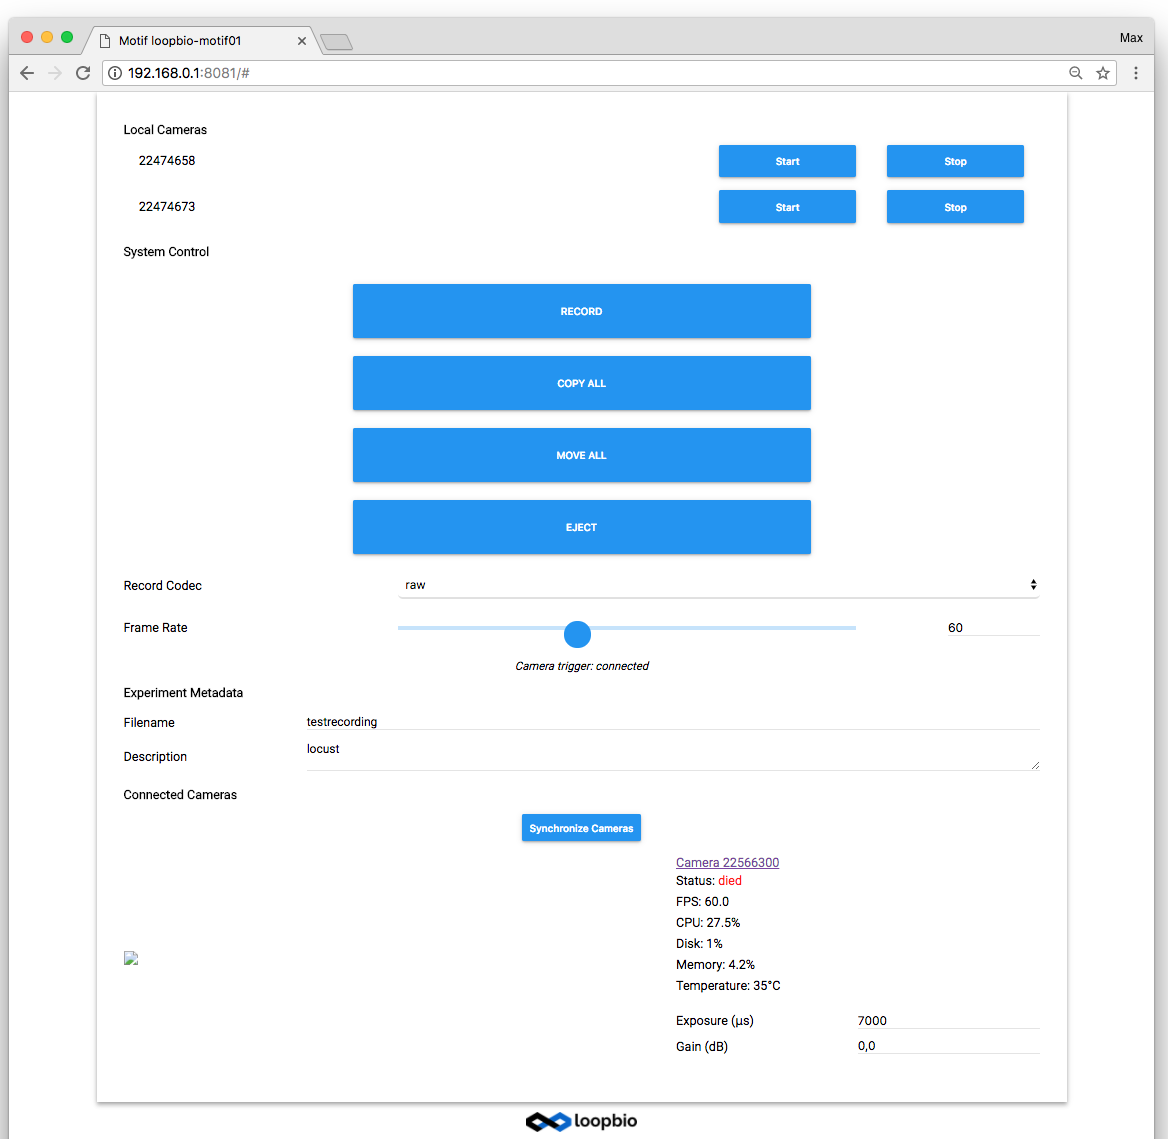
Monitor System Performance
1) Before starting a recording make sure that enough disk space is available. Motif will stop ecording as soon as the disk fills more than 94%.
2) Watch the CPU/GPU(only on lab systems) load, CPU should be <80%, GPU can be 100. However, the buffer should not be filling up. Recording performance (fps) on field systems might be influenced by thermal constraints, make sure that the recording has sufficient cooling (DO NOT COVER IT).
3) The buffer is for holding images until they can be stored/written to the recording. It should remain low and not fill up while recording. Filling up while recording indicates that the system load is to high. Reduce the frame rate or number of cameras you record from.
Camera Settings
Camera settings can be set for each camera separately from the "Configure" tab.
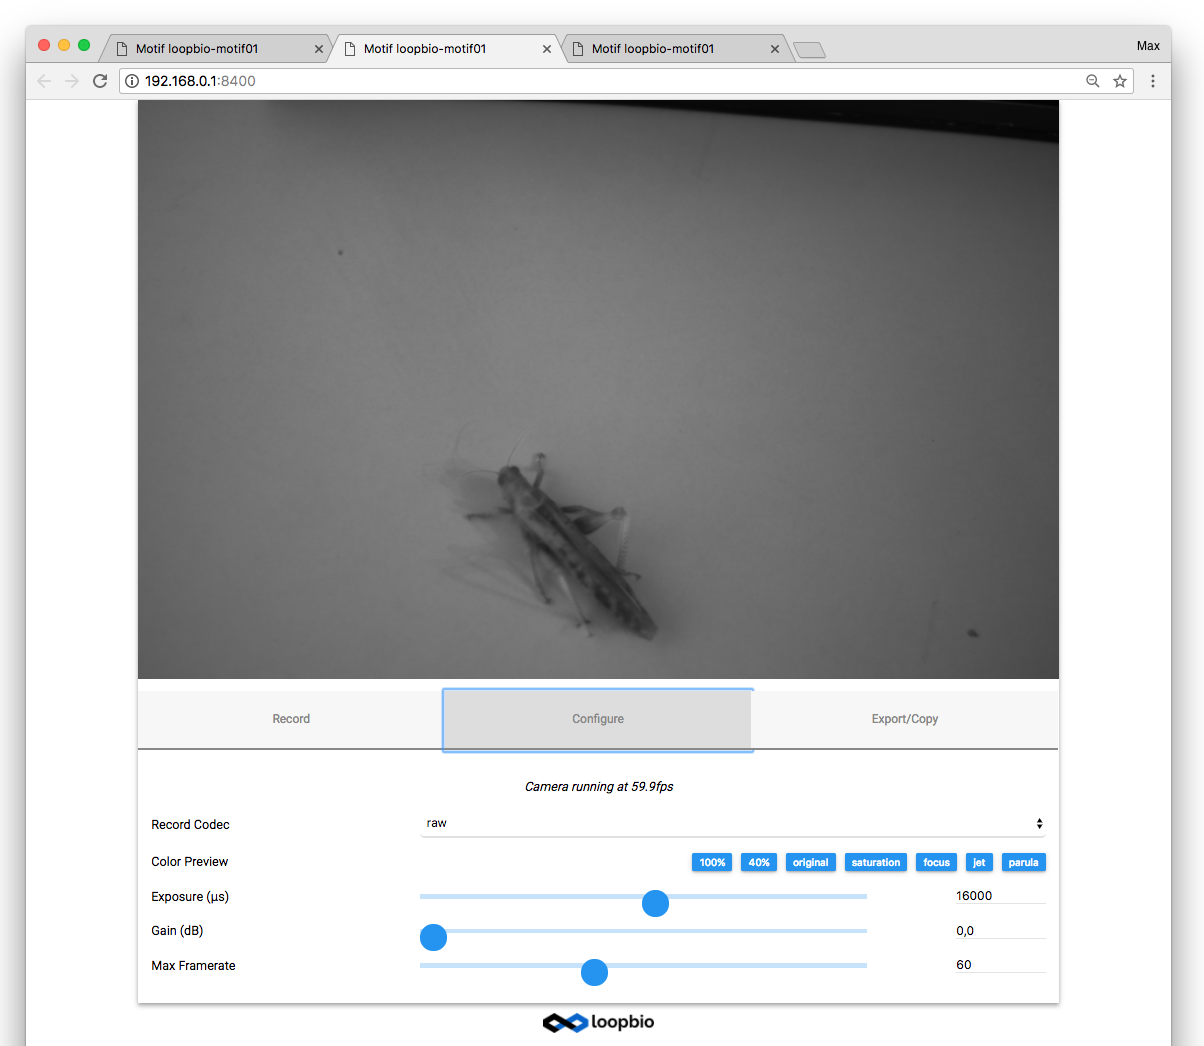
Single-camera System
- select the "Configure" tab
- set the framerate
- set the exposure time. The exposure time has to be <1000000µs / framerate. If the exposure time is longer the resulting framerate will be reduced.
- set the gain
- select the codec and set the framerate in the "Configure" tab. Field recording systems often
only support "raw", Lab systems ship with multiple preconfigured option optimised for the
specific system (see Codecs) for more details
Multi-camera System
Same as for single camera systems, but without setting the framerate and codec.
- select the "Configure" tab for each camera
- set the exposure time. The exposure time has to be <1000000µs / framerate. If the exposure time is longer the resulting framerate will be reduced.
- set the gain
Select the codec and framerate on the "Recording Control" page.
Export Recordings
Multiple camera field systems often do not support live compression, hence the disk fills up quite quickly with "raw" recordings. Exporting "raw" recordings to compressed files saves a lot of disk space. For doing this you need to attach and start one camera and attach a USB3 drive with enough free space to one of the USB3 Ports.
Export to an External Drive
(This is only supported from the multicamera view; not available on all systems) This will
enable the fields "EXPORT ALL", "COPY ALL", and "MOVE ALL".

"EXPORT ALL" first exports each raw recording to the "High" quality preset for export and moves the exported version to the external drive. If successful, the "raw" recording will be deleted.
"COPY ALL" all files ("raw" and "exported") will be copied to the external drive. Copy will only copy files that are not yet copied to the external file (synchronization)
"MOVE ALL" will move all files to the external drive not yet present. The copy on the recording system will be deleted.
"EJECT" the USB drive before disconnecting it
Export to This System (advanced usage!)
Exported movies are much smaller than "raw" recordings. Live compression is not possible as to slow
on field system. This step has to be moved to a later point in time. For exporting open the
camera menu and select the "Export" tab of one of the cameras.
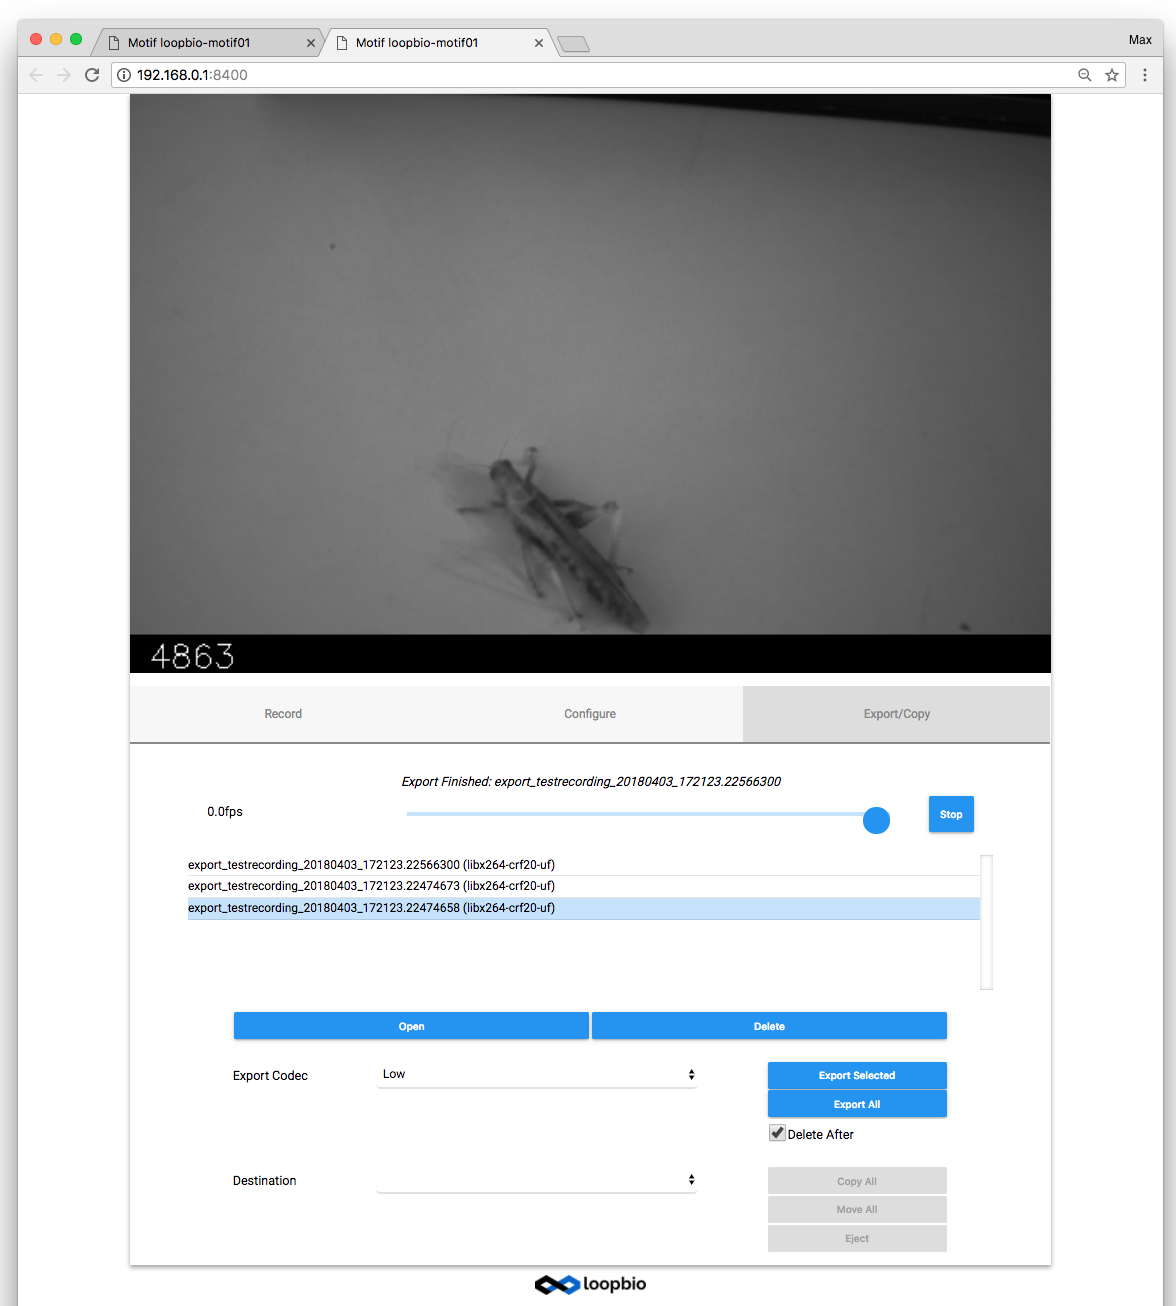
If you have exported movies that way do not use "EXPORT ALL" as it will re-export and might fail. To be save use "Export Selected".
It is possible but not recommended to export while powered from battery, however, long recording session might make it necessary.
Get data off a Motif system
Motif supports multiple ways to move data off the system. Open the camera menu and select the "Export" tab of one of the cameras.
The options available for your Motif system are listed in the "Destination" menu.
"COPY ALL" will copy all files to the external drive. Copy will only copy files that are not yet copied to the external file (synchronization)
"MOVE ALL" will move all files to the external drive not yet present. The copy on the recording system will be deleted.
1. USB Drive
Attach a USB 3 drive with enough free space. It will show up in the "Destination" menu as soon as it is ready. If a drive is not detected restarting the system might help.
2. Network share
Motif can mount network drives if connected to your local network. For configuration please contact the support team (support@loopbio.com)
3. rsync destination
If your Motif system is connected to your local network a "rsync destination" can be configured. For configuration please contact the support team (support@loopbio.com)
Troubleshooting
Page Loading Errors
if you see this happening the reason could be:
- you lost the connection to the Motif system
- you have a week network connection to the Motif system
- the Motif system is overloaded (mostly with field systems with to high framerate)
Camera Preview Problems
- reload the page
- restart the camera and check if the camera LED is on
- restart the system
- restart the system if a camera died
Disk Full
Motif will stop recording if he disk is more than 94% filled. This is to protect the system.